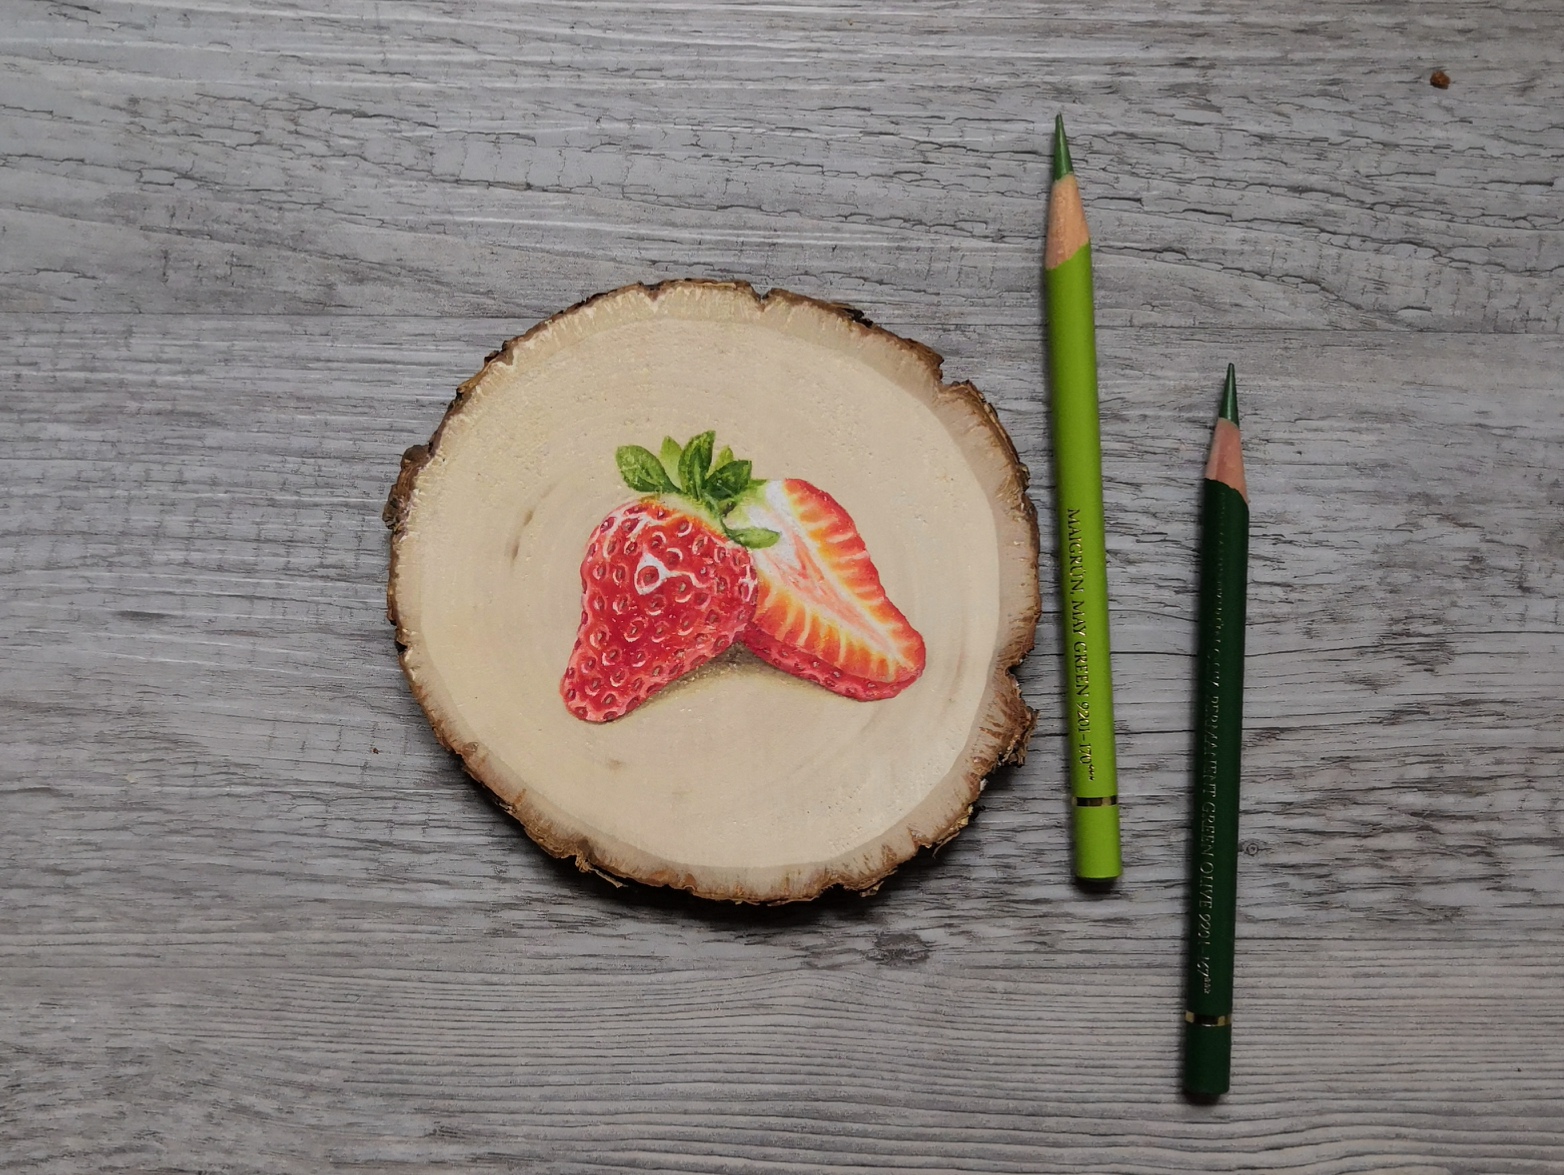
I was wondering if drawing on wood with colored pencil would actually be possible, because I couldn’t imagine it to work. So, I started my research and found a lot of examples of people doing it. I was very impressed of my new found knowledge and wanted to try it myself right away. At a local handicraft and paper store I randomly found those, about 10cm in diameter, wooden disc. I don’t know what type of wood it is, as it unfortunately doesn’t say it on the packaging. Anyhow, here are some points that I thought would be important if you want to draw on wood, so keep on reading if you’re intereste
PICK THE RIGHT TYPE OF WOOD
As I said, I don’t know what exact type of wood I used, but make sure to pick a rather hard type of wood, otherwise you would indent the wood with your pencils while drawing.
GET THE WOOD SURFACE AS SMOOTH AS POSSIBLE
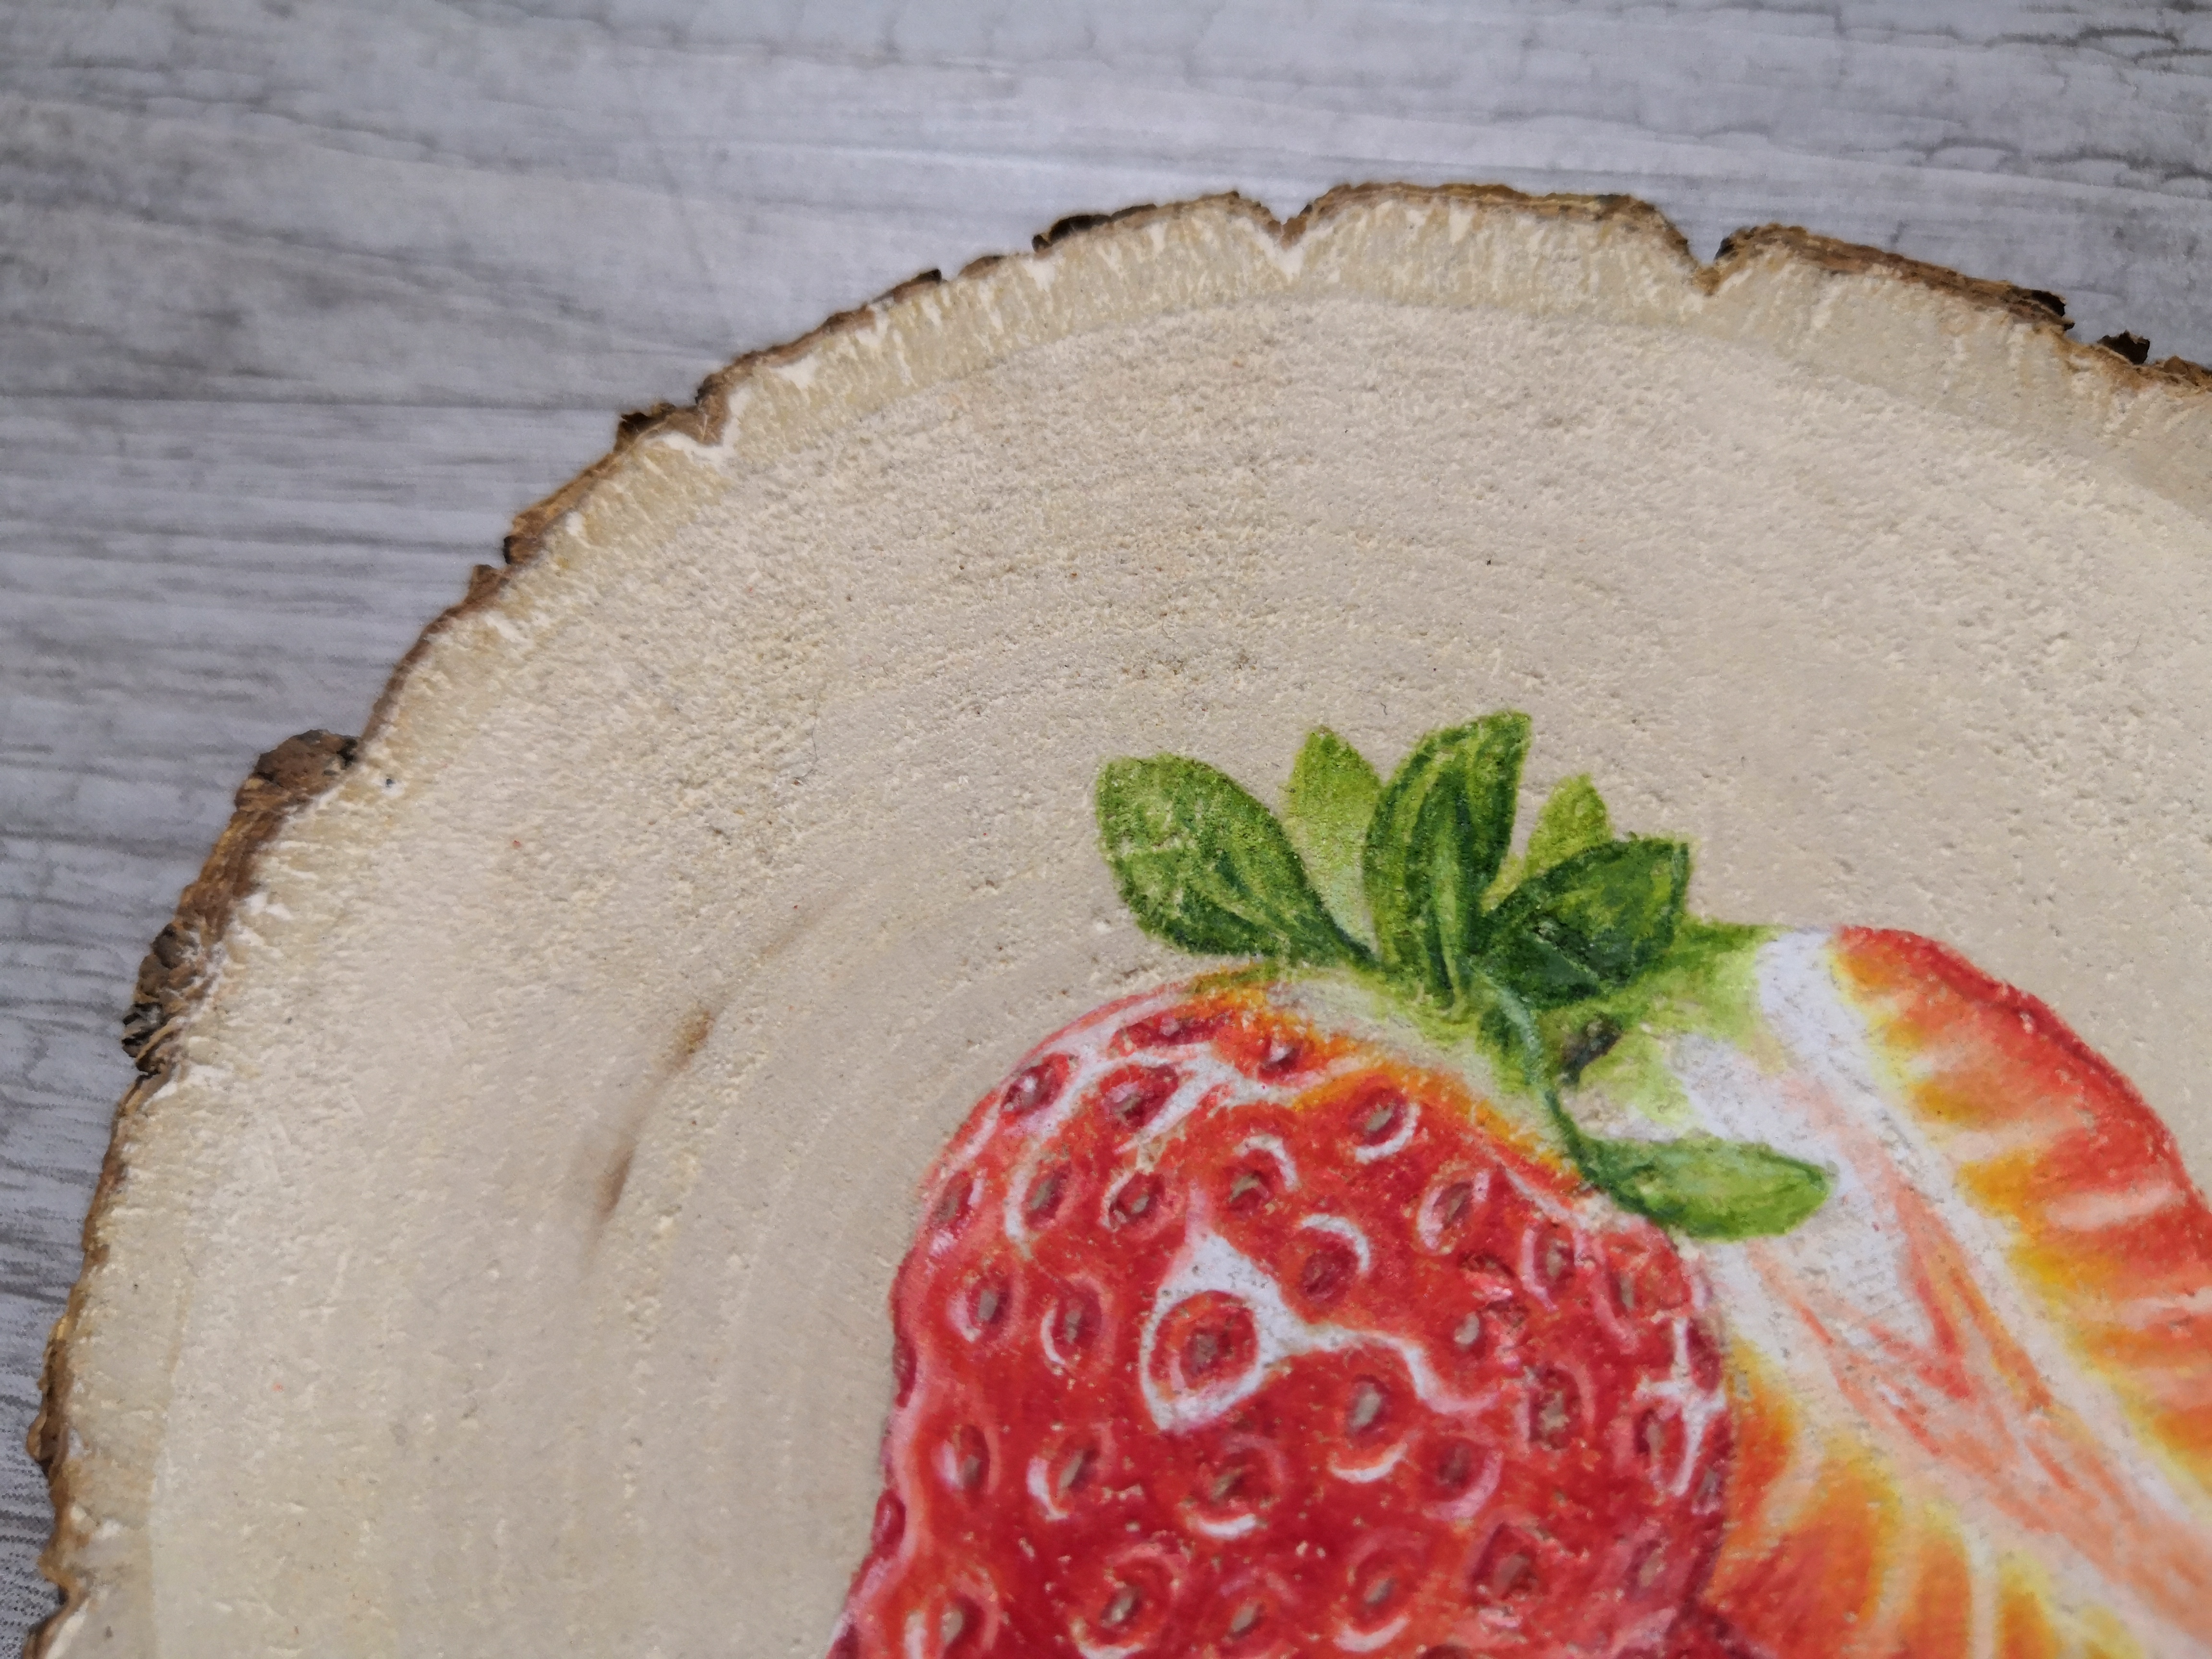
The wooden disc I used for my drawing had a quite rough surface. I tried to sand it down, but because I only had very fine sandpaper, it didn’t go as planned and I wasn’t able to get a smooth finish whatsoever. I tried to make the best out of it, but really struggled in those areas that were a bit rougher.
Here you can see the texture that was left on the wood that I couldn’t get rid of. It got quite tricky to draw in those areas because I had to try and colour the inside of the little indents.
WOOD TAKES THE PIGMENT REALLY EASY
One thing that I definitely wasn’t expecting was that the wood took the pigment very well. When working on paper you’re used to applying multiple layers to get an opaque and vibrant finish. But on wood the first layer applied with a very light hand already showed up very pigmented.
BLENDING WORKS REALLY WELL
Because of that rough surface wood can take a lot of layers of colored pencil and with that also a lot of pigment. Therefore blending works really well. It’s also possible to use a lighter colour over a darker, already drawn area and have it still show up. Obviously, it won’t be as bright as it would be on its own but it was still easy to brighten up certain areas.
PENCILS LOSE THEIR TIP FASTER
Even though you don’t need a lot of pressure to get the pigment to show up on the wood, the pencils get dull a lot faster than on paper. The roughness of the wood takes the pigment easier but therefore the pencils lose the sharp tip very quickly. If you can get the wood surface smoother to begin with, it probably wouldn’t be as bad.
SOFTER PENCILS WORK BETTER THAN FIRMER ONES
This one probably depends a bit on the wood you’re working on, but I realized that pencils with a softer core worked a lot better, as they don’t make indents into the wood as easily. I still used pencils with a firmer core to get sharper edges and details, but I had to be really careful to not push too hard into the wood.
So here you have it, everything I learned about drawing on wood the first time trying it out. I hope this was helpful for those of you who now might to want to try it out yourself. If you do so, make sure to share it with me, as I would love to see what you create.
Cheers,
10 thoughts on “DRAWING ON WOOD WITH COLORED PENCIL”
Ron
hi there,
I purchased a few of really fancy coloured pencils. they are fiber Castell polychrome pencils. they are an oil based pencils. I am just wondering if you have any experience working with these type of pencils on wood ?
Thank you for these tips! I am an artist who was commissioned to draw a large piece on a fabulous piece of wood. I knew it could be done, but didn’t know the “tricks”. I know it will be fabulous, so thank you again!
Thankyou so much for this post!!!! I always come back to this and read through it!! When I first found this page, it convinced me to try wood. Now every time I want to do another project on wood I always refer here! Wonderful artwork/skill and Thankyou again!
Oh thank you so much Jacqueline! Your arice really helped me out coz I didn’t know about this til today, and I’m super excited about this and i have some pieces of wood so I wanna try it! Thanks again. Bye!
I, Jacqueline Wuitz (Place of residence: Austria), would like to process personal data with external services. This is not necessary for using the website, but allows me to interact even more closely with them. If desired, please make a choice:
I, Jacqueline Wuitz (Place of residence: Austria), would like to process personal data with external services. This is not necessary for using the website, but allows me to interact even more closely with them. If desired, please make a choice:
Analysis / Statistics (1 Service)
Anonymous evaluation for troubleshooting and further development

 English
hi there,
I purchased a few of really fancy coloured pencils. they are fiber Castell polychrome pencils. they are an oil based pencils. I am just wondering if you have any experience working with these type of pencils on wood ?
thank you
Ron
Hi Ron,
sorry for the late response! Faber Castell Polychomos work great on wood, they are the one’s I’ve used here 🙂
Have fun creating!
Jacqueline
Thank you for these tips! I am an artist who was commissioned to draw a large piece on a fabulous piece of wood. I knew it could be done, but didn’t know the “tricks”. I know it will be fabulous, so thank you again!
Thanks for you comment! I’m hoping it helped you creating your art piece!
Thankyou so much for this post!!!! I always come back to this and read through it!! When I first found this page, it convinced me to try wood. Now every time I want to do another project on wood I always refer here! Wonderful artwork/skill and Thankyou again!
Sorry for my very late response. Thank you! I’m so glad I could help you create some amazing art!
this is a great idea for artist like me who love to art in a natural materials and wood material.
Oh thank you so much Jacqueline! Your arice really helped me out coz I didn’t know about this til today, and I’m super excited about this and i have some pieces of wood so I wanna try it! Thanks again. Bye!
Sorry for the very late response. I’m glad I could help and hope it worked out for you!
Pingback: Drawing On Wood Ideas - Bolleblu.info